Below is a Step-by-Step guide to create and run your own Elections on your UConntact page.
Sections Include:
- Accessing the Elections Builder
- Creating an Election
- Creating Ballots
- Additional Candidate Information
- Publishing/Opening the Election
- Accessing Results!
Running an Election on UConntact (Step-By-Step)
Logging In
Step 1 – Login to uconntact.uconn.edu with your NetID
Step 2 – Scroll to Memberships > RSO > Manage


Step 3 – Click the 3 line menu on the left and go to “Elections”
Creating the Election
Step 1 – Select Create Election blue button > Elections tab > Election List > Create Election
Step 2 – Name your election (ex. Ninja Warrior Club Officer Elections Spring 2020). Add set of instructions and set the times that your election will run
Step 3 – Make Election “Active”, set open/close dates, and to only allow members of your RSO roster to vote. Click SAVE to create ballots
Creating the Ballots
Step 1 – From the “Ballots” tab you can create new question forms for voters to answer. When creating a ballot, set it to General Access so all of your members can vote.
Step 2 – Once the ballot is created you should see it on the main page of your election and from there you can click on the pencil icon to edit it.
Step 3 – In “Edit Mode” you can choose exactly which types of questions you want to have in your ballot.
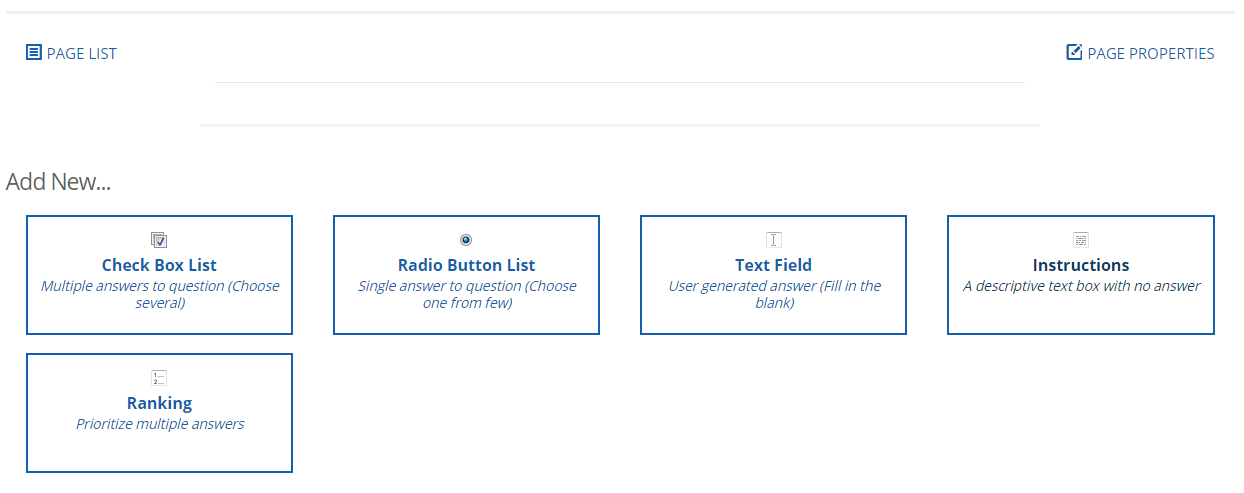
“Check Box List” – You may want to utilize this question type for a position being elected that has multiple candidates. When editing this type of question you can even set exactly how many check-boxes can be chosen by the user (i.e. if you are running an election with eight candidates and the question asks the voter to pick up to four).
“Radio Button List” – This type of question is most commonly used for questions that only require a “yes” or “no” answer, or elections where only one candidate is to be chosen for a position.
“Text Field” – This feature is utilized when a ballot initiative has no candidate named, and only includes a write in option or for collecting data about the voter in the election; most commonly in the form of an email address or other form of contact information. You can also use this feature for collecting opinions that may not necessarily “fit” into a normal set of answer choices.
-
- This should NOT be confused with creating a write-in answer choice for a question which also has candidates, which is accessible with all of the possible question types.
“Instructions” – This section is often used to create directions for users of the election.
“Ranking” – This is used more commonly in RSO elections when trying to determine what the best solution to a problem is (i.e. “Put your choices for a new local philanthropy in order from 1 to 5”)
Adding Additional Candidate Information
Step 4 – One thing that is very common to use elections for is adding “Additional Text” to a candidate’s name. In order to do this click on the “answers” tab and then the editing (pencil) icon. 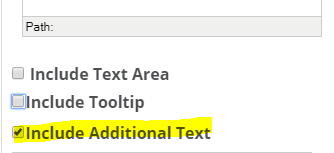 This is utilized for adding information such as a campaign platform, terms and conditions, pictures of a candidate, etc. Pictures need to be first uploaded to a website.
Contact SOLID@uconn.edu if you wish to utilize photos in your elections. Ambassadors can assist you with getting access to the correct URLs.
Adding a “Tooltip” is another common additional text field used in ballot questions and when applied, it looks like an underlined answer choice that, once scrolled over reveals a campaign slogan, additional name, etc. This is typically not used in the Joint election process.
Publishing Your Election
Step 1 – When your election is ready to be accessed by voters, you can click on the “Properties” button again switch your election from “Inactive” to “Active.” This will make it available for your voter base.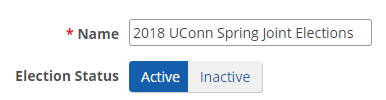
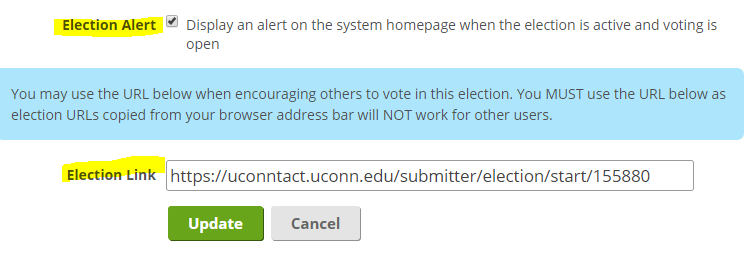
Step 2 – Once the election is “Active,” you can also decide whether you want it to appear on the UConntact homepage to increase visibility and/or if you just want to send a link to your voter base – typically for small elections a link is sent, but for larger, campus-wide elections a message is posted.
Collecting and Exporting Results
Step 1 – After your Election expires on UConntact (the end time that you have previously set), you will be able to collect and analyze the results as long as you have administrative access. From this stage you will be able to see how many people voted for each question on your ballots as well as who they voted for.
Step 2 – If you want to actually save the results of your election rather than just viewing them on UConntact, you can click the “Export All Votes” button or “Export Votes” for each particular ballot to get an Excel file with all of your data neatly organized so it is easy to determine a winner.
If you have any questions regarding elections, reach out to an Ambassador from the SOLID Support Team at SOLID@uconn.edu